This post was originally posted in my French blog.
I was recently in Short Rows Period: my WIPs, discovery of a new method, discussion on Twitter about the best way to wrap sts of W&T, that has given me food for thought.
Here's a little comparative study of different techniques. It's pretty long!
My default method was W&T. As this method is frequently employed in English patterns, I was used to this technique.
But you know, I'm Japanese, I compared it to Japanese methods. Yes, methods in the plural, because
there are two.
You've perhaps heard of “the Japanese Short Rows method”, that only uses a slipped st at each turn. This technique only requires split markers (or safety pins, paper clips…) that you put on working yarn to mark the connecting loop. When you get back, you will lift it to resolve the gaps.
Another Japanese method uses YO and slipped st. It's the method Japanese knitters learn first as it's considered easier than "the Japanese Short Rows method". In brief, you make a YO at each turn, turn work and slip the first st of next row.
The thing those two methods have in common is "slipped st" at turns, which results in one less row than W&T method.
Here's the difference expressed in chart:
| W&T | Japanese methods |

|

|
Grey cells indicate what you do (wrap in W&T, yo and slipped st in Japanese methods) and will disappear from RS once you resolve short rows. What we can see with the charts is that the "slope" is smoother with Japanese methods.
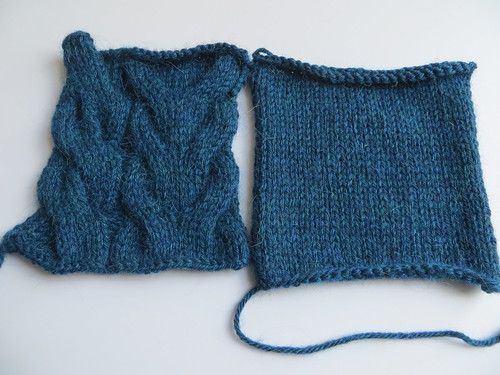
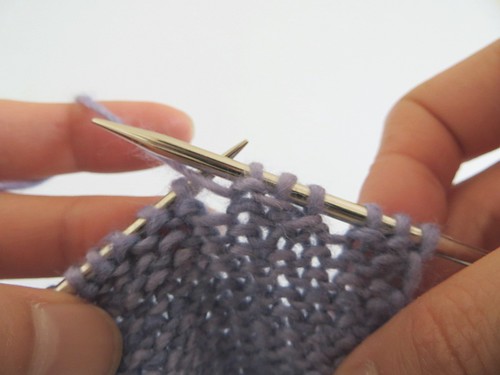
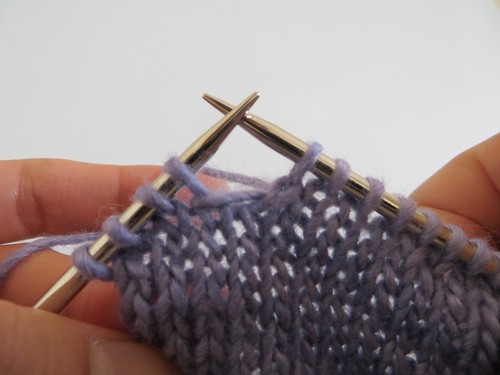
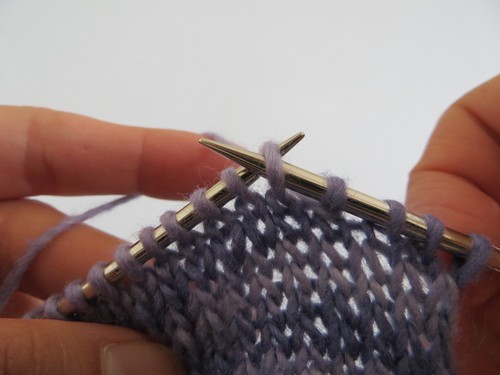
With a real yarn, you get this result:
 |
| Malabrigo, Silky Merino: London Sky! |
On this picture, the sts just below short rows are marked with pins: from left to right, Japanese method with yo (method 2), "the" Japanese method (method 1) and W&T. And the row where short rows' gap is resolved is in darker blue. We can see that there are 3 rows between pinned row and dark row with W&T and only 2 rows with Japanese methods.
Then, Japanese methods are superior to W&T? The answer is yes and no.
Yes because the result is neater as I've demonstrated so far. And No because of the "handiness" of W&T: with the method 1, you need split markers or any other similar tool in your hands whereas you just need your needles and working yarn with W&T. As for the method 2, when resolving short rows, you simply knit the YO and the next st together on RS, but on WS, you have to reverse the YO and the next stitch before purling them together – yes, I'm slacker.
Then, what happens when you mix W&T and Japanese methods? That will be the subject of the next post!